
If you’re a site owner who is having problems responding to your clients questions about your products and services because you lack the means to do so, then setting up a chatting tool would be a great idea of solving that problem. Chatting tools are great in customer support as they can relay messages instantly from one person to another via live chat.
One such chat software, Chatwing, brought chatting to a whole new level because it was complimented with a lot of features, which in turn made the whole chatting experience even better. Chatwing has already been used by a lot of people in their sites, and if you want to be one of them, all you have to do is follow this easy step by step process of embedding this nifty chat software on your site.
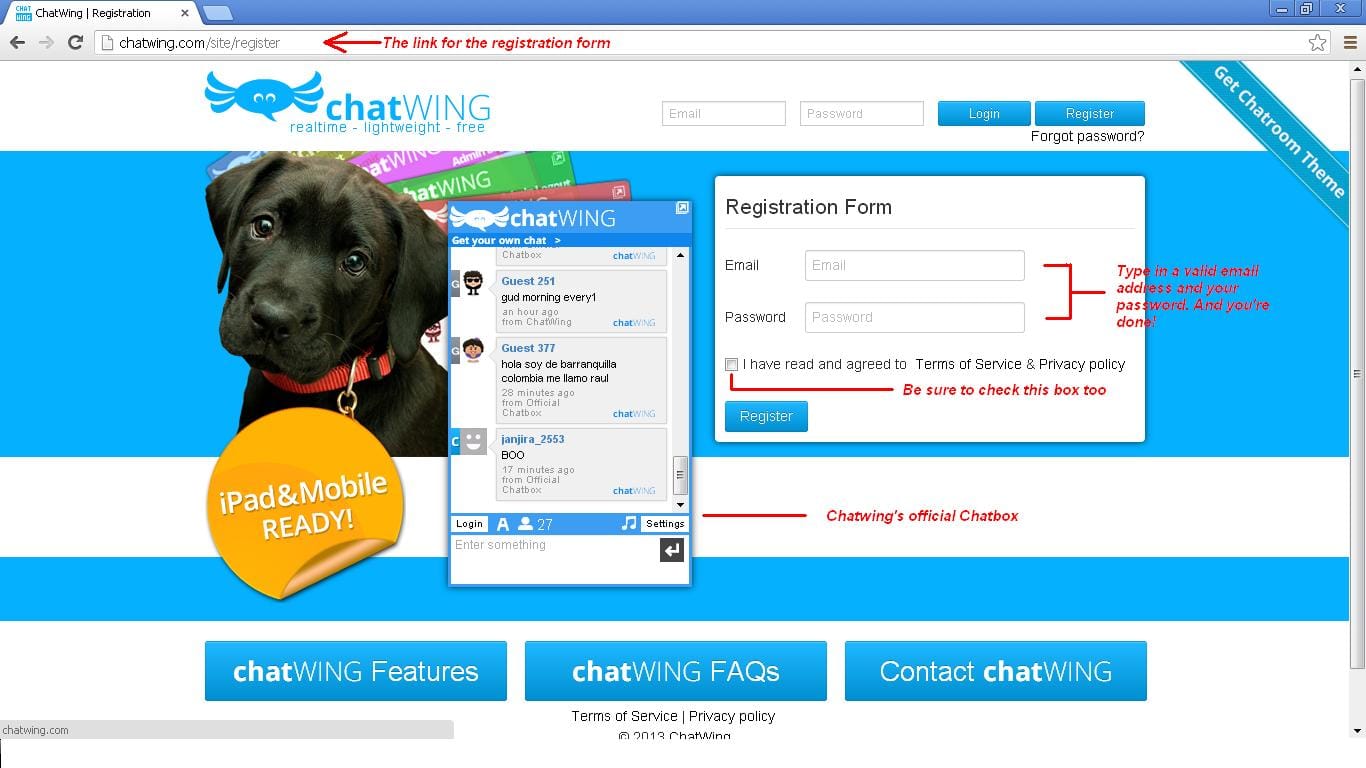
Register
You must first have a Chatwing account in order to make a chatroom. You can do so by filling up the registration form at the Chatwing homepage. You’re only required a valid email and a password to make an account so it will only take less than a minute to complete the registration process. You’ll be taken to the Dashboard page once you’re done.
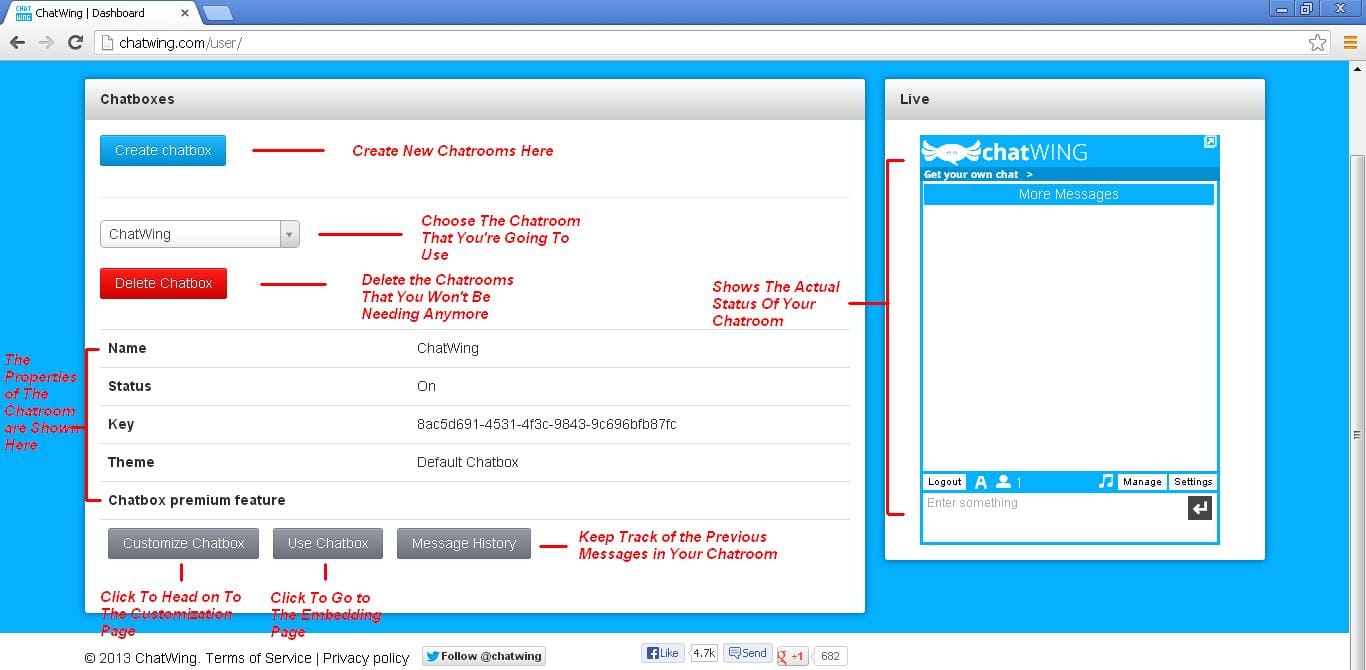
Dashboard
The Dashboard page is where you can view all the chatrooms you have so far. This is also where you can manage them and queuing them for modification or for use. You have one chatbox you can already use there so choose that one. Now press the Customize Chatbox button for the next step.
Customize
This page is where you can change the parts of your chatbox to make it more appealing for your users. Aside from modifying it visually, this is also where you can apply and set up most of the chatting tool’s features like the admin controls and the word filter. The whole process is divided into tabs to make it easier for you to navigate and change a certain part of the chatbox. Just make sure that you press the Save button placed on each tab to make those changes permanent until you change them again.
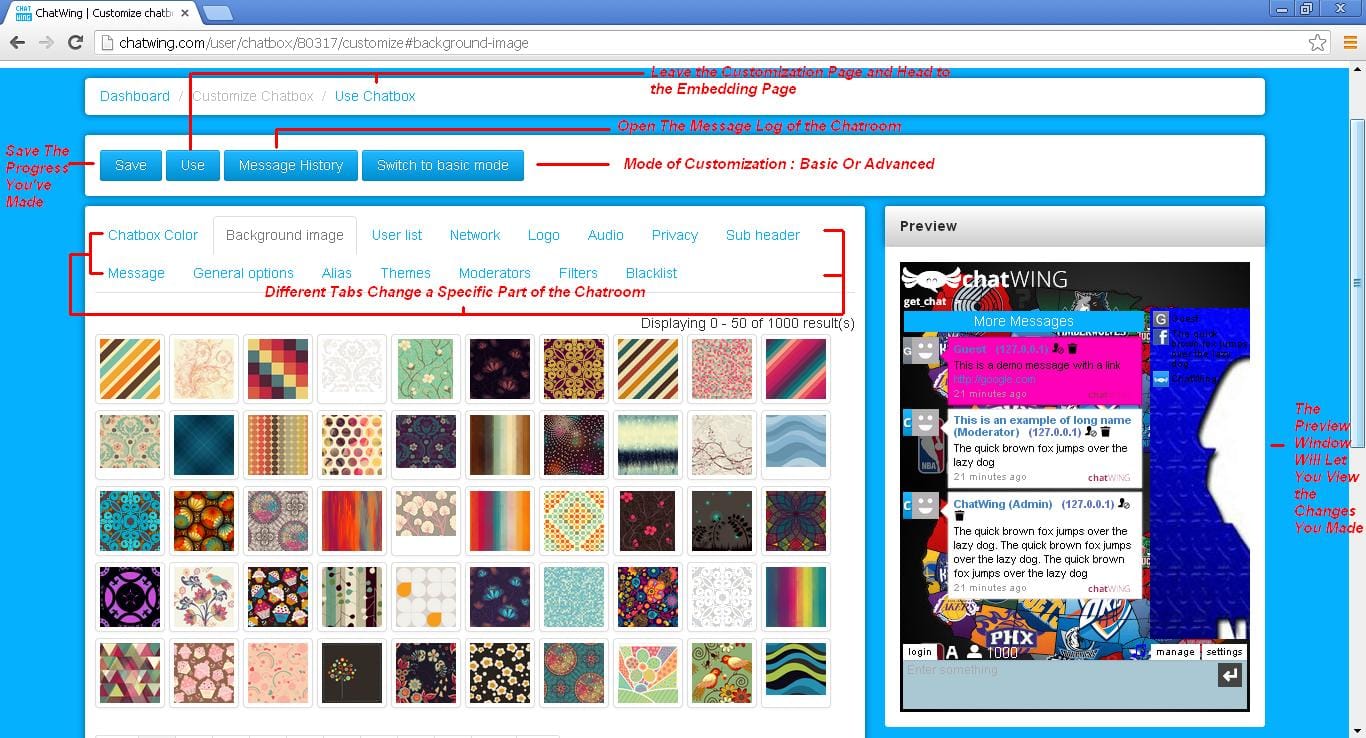
Once you’re done with modifying, its time for the final adjustments. Press the Use button on the upper part of the Customization page.
Embedding
The next page you’ll be in is the Embedding Page. There are three tabs here – choose the one in the middle, the Embedded Options tab.
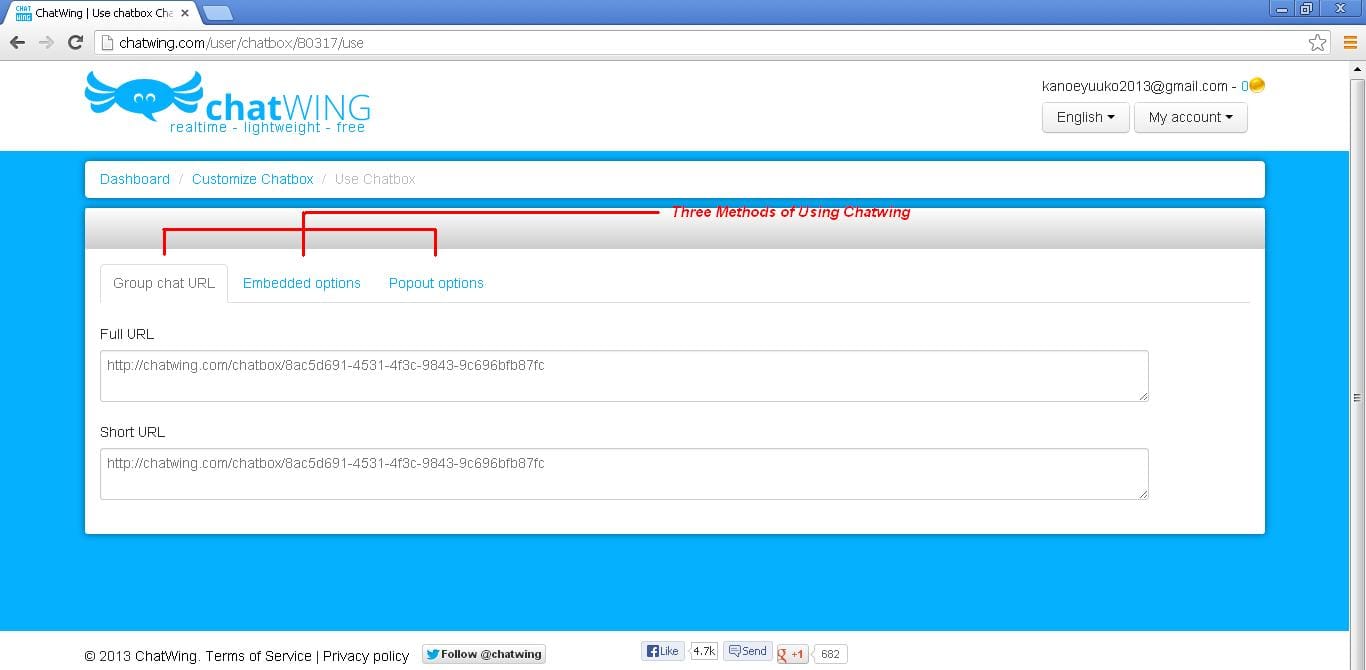
The Embedded Options is where you’ll see the HTML codes for your chatbox. But before going there, you can adjust the size of your chatbox using the Height and Width scroll bars. You can see an image of your chatbox in the preview window – this is what your chatroom is going to look like once it goes live on your site.
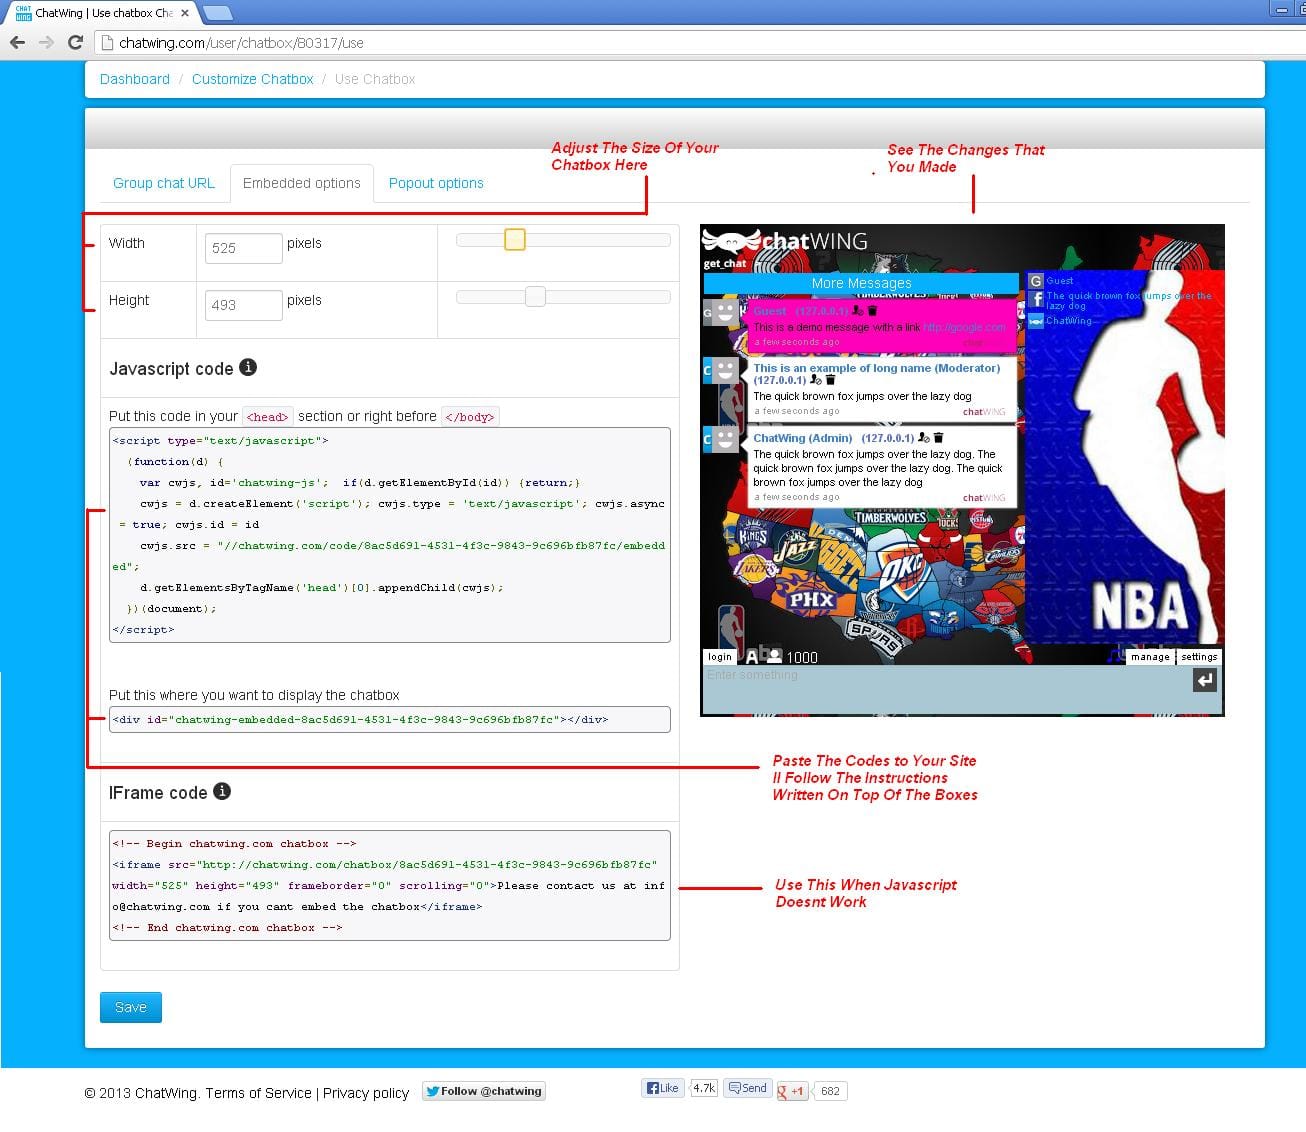
Once you’re contented with the size of your chatbox, you can now embed it on your site. Simply look for the HTML codes inside the Javascript box and the ones just below it. Copy those two and paste them into your site.
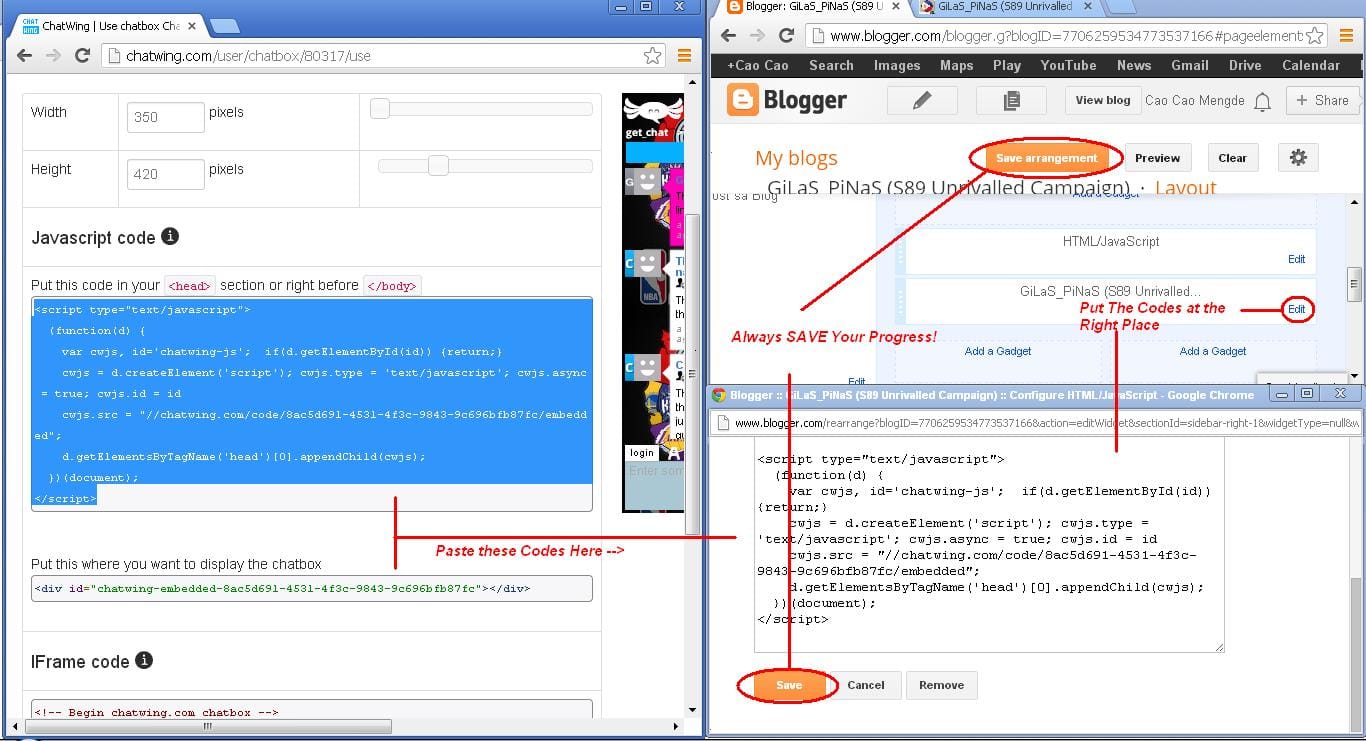
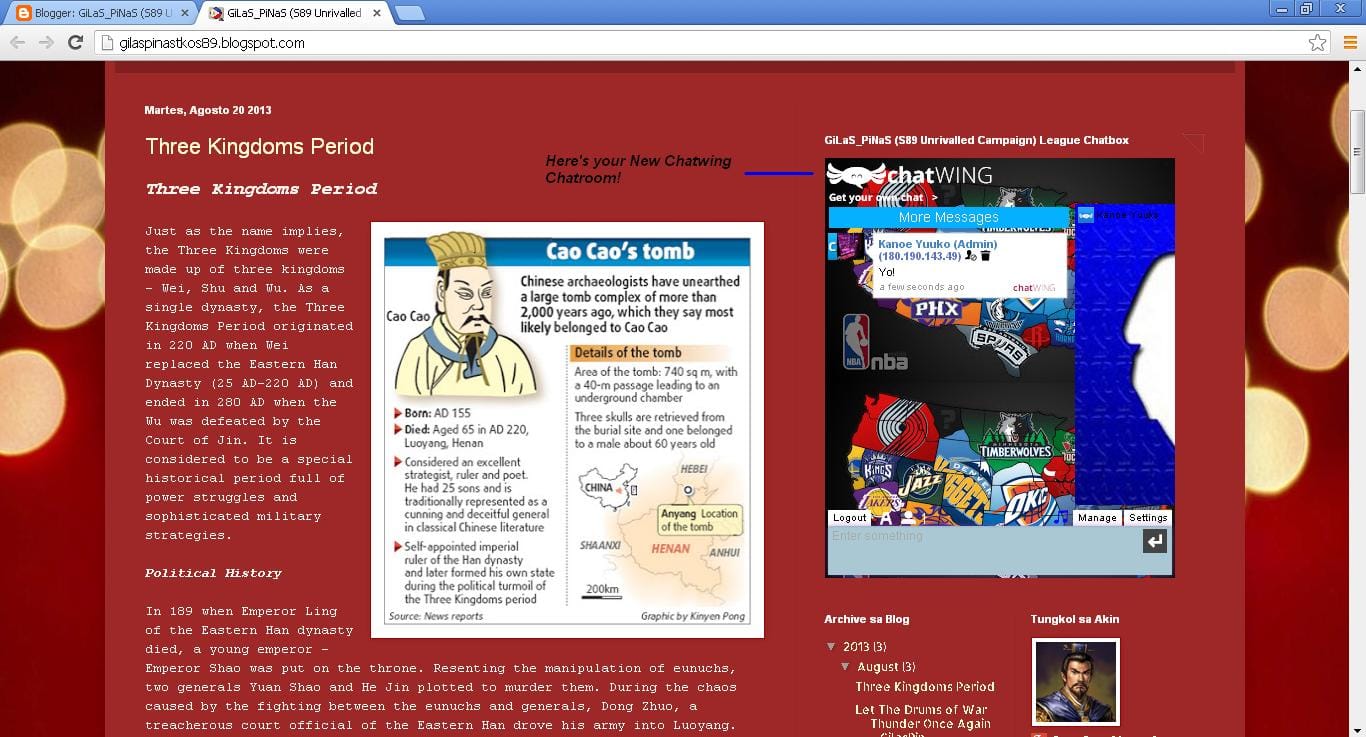
When you’re done, save the changes you’ve made on your site. Now open your site again – the chatroom should be there where you intended to put it.
Note: Sometimes there are sites that don’t support Javascript. If your site happens to be one of these, then replacing the Javascript code you copied with the codes on the iFrame box will solve that problem – it’s also found in the Embedded Options tab.
Chatwing has been providing great customer support to the sites that have used it. It’s getting better and better as its developers are still improving this chat software and make it more efficient in delivering the best chatting experience for its chatters. There’s no reason why you shouldn’t get this because it’s not only very useful, it’s also free.